When Is the Best Time to Transplant Rose of Sharon Plants?
- August 11, 2025
- By Michael Woods
Deciding when to transplant a Rose of Sharon shrub can be tricky, but understanding its needs makes all the difference. My goal is to help you determine the best time to relocate your plant so it thrives in its new location. It’s all about timing and a little bit of preparation.
Key Takeaways
- The best times to transplant Rose of Sharon are in the fall after it goes dormant or in early spring, just before it starts to bud.
- Avoid transplanting during the hot summer months or when the ground is frozen in winter, as this can stress the plant.
- Prepare the new site ahead of time by loosening the soil and adding compost.
- Pruning the shrub back by about a third before moving it can help reduce stress and make the process easier.
- After transplanting, water the shrub thoroughly and keep the soil consistently moist until new growth appears.
Understanding the Rose of Sharon (Hibiscus syriacus)
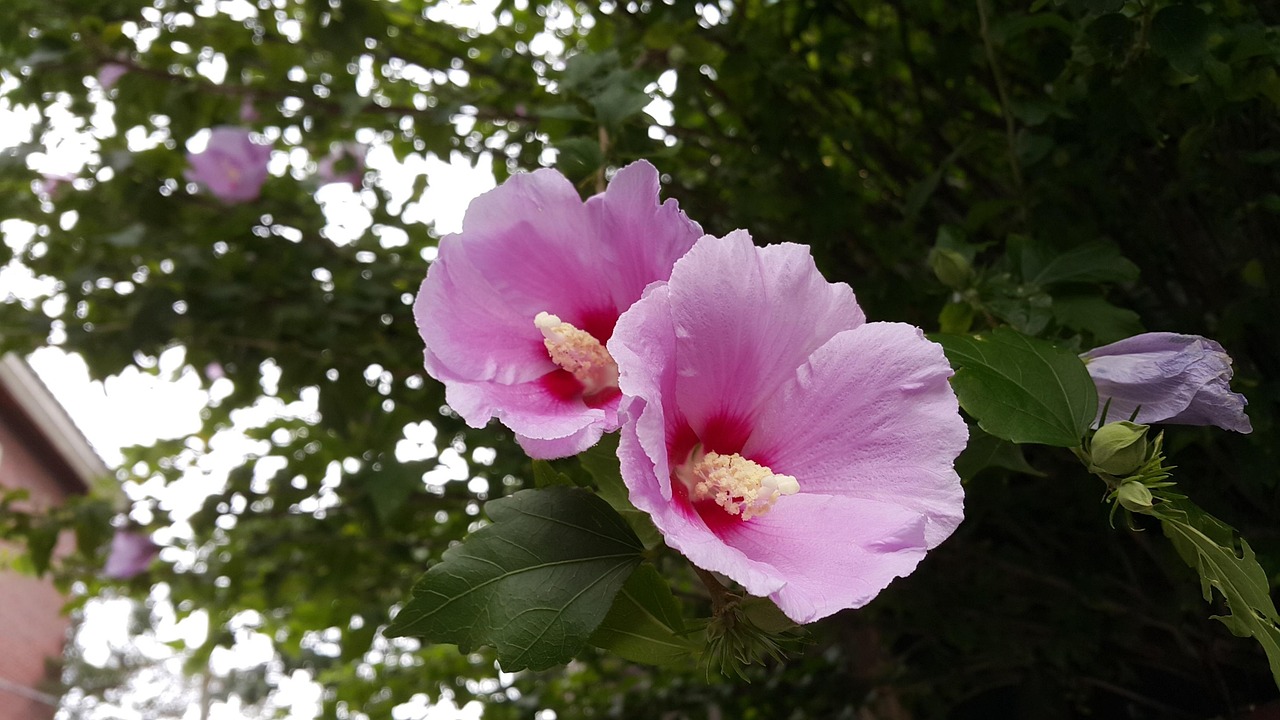
When I first started gardening, the Rose of Sharon, or Hibiscus syriacus, was one of those plants that just seemed to be everywhere. It’s a pretty common sight, and for good reason. This shrub is known for its big, showy flowers that pop up in the summer, a time when not many other plants are blooming. They come in a nice range of colors, from white and pink to lavender and blue, often with a darker center that makes them stand out. It’s native to Asia and is part of the mallow family, which also includes hollyhocks.
What is a Rose of Sharon?
The Rose of Sharon is a deciduous shrub that can grow quite large, often reaching heights of 8 to 10 feet and spreading about 4 to 6 feet wide. It has an upright growth habit with open branches, making it suitable for various garden styles. The flowers are trumpet-shaped and can be single or double, with prominent stamens. They are a favorite for attracting butterflies and hummingbirds to the garden.
Why Transplant Rose of Sharon?
There are several reasons why someone might want to transplant a Rose of Sharon. Perhaps the current location doesn’t get enough sun, or maybe it’s become overgrown and needs to be moved to a spot where it has more room to grow. Sometimes, you just want to rearrange your garden layout. Whatever the reason, knowing the best way to move these shrubs can save them a lot of stress and help them establish quickly in their new home.
Key Characteristics for Transplanting
- Bloom Time: Blooms in summer to fall, providing color when other shrubs may have finished.
- Size: Can reach 8-10 feet tall and 4-6 feet wide, so plan for adequate space.
- Sunlight Needs: Prefers full sun (at least 5-6 hours daily) for best flowering.
- Soil Preference: Adaptable to most soil types, but needs good drainage.
Moving a plant, especially a shrub like the Rose of Sharon, is always a bit of a gamble. You want to give it the best possible chance to survive and thrive in its new spot. This means picking the right time and preparing both the plant and the new location carefully.
If you’re looking to add this beautiful shrub to your garden or need to relocate an existing one, understanding its needs is the first step. I’ve found that with a little planning, transplanting is quite manageable. You can find more information onHardy Hibiscus if you’re interested in other varieties.
Optimal Seasons for Transplanting Rose of Sharon
When considering the best time to move your Rose of Sharon, I’ve found that timing is really key to helping the plant adjust with minimal fuss. The goal is to transplant when the shrub isn’t actively growing or stressed by extreme temperatures. This generally points to two main windows: early spring or fall.
Spring Transplanting
If you opt for spring, aim for the period after the last hard frost but before new growth gets going. This gives the plant a chance to establish its roots in the warming soil before the summer heat arrives. It’s a good time to transplant, especially if you missed the fall window.
Fall Transplanting
My personal preference leans towards fall. Moving the Rose of Sharon in autumn, typically from September through November, allows the plant to settle in over the cooler months. The roots can spread and grow without the demands of producing leaves and flowers, setting it up for a strong start the following spring. It’s a bit like letting the plant get comfortable before its big performance.
Avoiding Summer and Winter Moves
I strongly advise against transplanting during the peak of summer. The heat and potential for drought put immense stress on a newly moved plant, making it much harder for it to survive and thrive. Similarly, moving a Rose of Sharon when the ground is frozen in winter is not practical and can damage the roots. If you absolutely must move a plant outside of these ideal times, be prepared for extra care, like consistent watering and providing some shade. For container-grown plants, you have a bit more flexibility, as long as the ground isn’t frozen, but spring and fall are still the least stressful options. You can find more information on planting the Rose of Sharon to help prepare.
Transplanting is always a bit of a shock to a plant, so choosing the right season makes a big difference in how well it recovers and continues to grow.
Climate Considerations
When I think about moving a Rose of Sharon, the first thing that comes to mind is the weather. It makes a difference, you know? Trying to transplant a shrub when it’s scorching hot or freezing cold is just asking for trouble. It puts a lot of stress on the plant, and honestly, it might not recover.
Best Times by Season
- Early Spring: This is generally my go-to time. I aim for just before the buds start to swell. The plant is still waking up from dormancy, so the shock is minimal. Plus, as soon as it starts growing, it’s already working on healing those disturbed roots.
- Fall: This is another solid option. Moving the shrub in the fall gives it the entire winter and spring to get its roots established before the heat of summer or its blooming period. It’s a good way to set it up for success.
Avoiding Summer and Winter
I try to steer clear of transplanting during the peak of summer. The heat can be brutal, and the plant will need a lot more water to cope. Winter is also tricky because the ground can be frozen, making it hard to dig, and the plant is completely dormant, so it can’t start any healing process.
Adapting to Your Local Climate
It’s not just about spring or fall in general; it’s about what’s happening in your specific area. If you live somewhere with really harsh winters, getting the transplant done in early fall is better than waiting until late fall. Conversely, if your springs tend to be short and quickly turn hot, you’ll want to get it done as early as possible.
It’s always a good idea to check the long-range weather forecast before you dig. You want to avoid any sudden temperature swings or extreme weather events right after you move the plant. A few mild days are ideal for the initial transplant.
For example, if I’m in a warmer zone, I might have a slightly longer window in the fall. But if I’m in a colder zone, I need to be more mindful of the first hard frost. It’s all about finding that sweet spot where the plant can settle in without facing extreme conditions. Thinking about the plant’s needs and your local weather patterns is key to a successful move, and I always try to prepare the new site well in advance, maybe even amending the soil a few months before, as I read about for preparing the new planting site.
Preparing the New Planting Site
Before I even think about digging up my Rose of Sharon, I need to make sure its new home is ready. This step is really important for giving the plant the best chance to settle in without too much fuss. I always start by picking a spot that gets plenty of sun, at least six hours a day. Good drainage is also key; these shrubs don’t like having their roots sit in soggy soil.
Site Selection Criteria
- Sunlight: Aim for a location that receives at least six hours of direct sunlight daily. More sun generally means more blooms.
- Soil Drainage: The site should drain well. If water tends to pool after rain, consider amending the soil or choosing a slightly elevated spot.
- Space: Give the Rose of Sharon enough room to grow. Check the mature size of your specific variety, but generally, a few feet of clearance around the plant is a good idea.
Hole Preparation
When I prepare the hole, I try to make it wider than the root ball, usually about twice as wide. This gives the roots room to spread out easily. The depth should be about the same as the current root ball, so the plant sits at the same level it was before. I usually dig the hole a few days in advance if the weather permits, so the soil has a chance to air out a bit. If I’m adding anything to the soil, like compost, I mix it in thoroughly with the soil I removed from the hole. This helps avoid creating a ‘bathtub’ effect where water might collect.
It’s a good practice to have the new site completely ready before you disturb the Rose of Sharon you plan to move. This minimizes the time the plant’s roots are exposed to air, which can cause them to dry out.
Soil Amendments
While Rose of Sharon isn’t overly picky, I like to give it a little boost. Mixing in some compost or well-rotted manure into the soil I’ll use for backfilling is something I often do. This adds nutrients and improves soil structure. I usually aim for a mix that’s about 75% original soil and 25% compost. This helps the plant transition gradually to the new soil conditions. For more on plant care, I found some helpful tips on gardening advice.
Pruning Before Transplant

Before I move my Rose of Sharon, I always give it a good trim. This might seem a bit counterintuitive – why cut back a plant you want to help establish? Well, it’s all about reducing stress. Think of it like packing for a big trip; you want to make things as light and manageable as possible. For a shrub, this means cutting back on the amount of foliage it needs to support while its roots are being disturbed and trying to re-establish themselves.
Pruning before transplanting helps the shrub conserve energy and water. It reduces the surface area from which moisture can be lost through transpiration, which is especially important when the root system is temporarily compromised. It also makes the physical act of digging and moving the plant much easier, especially if it’s a larger specimen.
What to Prune
When I prune, I focus on a few key areas:
- Dead, Damaged, or Diseased Wood: This is a no-brainer. I always remove any branches that look unhealthy, regardless of the season, but it’s especially important before a move. These parts won’t contribute to the plant’s recovery and can even invite problems.
- Crossing or Rubbing Branches: Branches that rub against each other can create wounds, making the plant more susceptible to pests and diseases. I’ll thin these out to improve air circulation and prevent future damage.
- Overly Long or Weak Branches: To make the shrub more compact and easier to handle, I’ll shorten branches that are excessively long or spindly. This encourages a bushier growth habit in the long run, too.
How Much to Prune
It’s important not to go overboard. I usually aim to remove about one-third of the plant’s total growth. This is a good balance – enough to reduce stress but not so much that it shocks the plant. It’s better to be a bit conservative with pruning before a transplant. You can always do more pruning after the shrub has settled in, perhaps during its next dormant season. Remember, the goal is to help the plant recover, not to reshape it drastically at this stage. For more on general pruning, you can check out when to prune the Rose of Sharon.
Pruning is a way to help the plant focus its energy on root development after the transplant, rather than on supporting a large amount of leafy growth. It’s a proactive step to minimize transplant shock and promote a quicker recovery.
Digging Up the Rose of Sharon
Moving a mature Rose of Sharon can seem like a big job, but with a little preparation, it’s quite manageable. My goal is always to minimize stress on the plant, and that starts with careful digging. I usually tackle this in the cooler parts of the day, either early morning or late afternoon, to avoid the worst of the sun.
1. Assess the Root Ball Size
Before I even pick up a shovel, I try to get a sense of how big the root ball is. I gently clear away some of the soil around the base of the shrub. The general rule of thumb is to dig a hole that is at least twice as wide as the current root ball and as deep as it is. This gives the roots plenty of room to spread out in their new home. For a well-established shrub, this might mean a diameter of two to three feet or even more.
2. Prepare the New Location
While I’m assessing the old spot, I also make sure the new spot is ready. This means digging the hole first. It should be the same depth as the root ball and twice as wide. I like to amend the soil I dig out with some compost before I backfill, which gives the plant a good start. It’s also a good idea to have water ready.
3. Loosen the Soil Around the Shrub
Now, for the digging. I start by digging a trench around the Rose of Sharon, about 6 to 12 inches away from the main stem. I dig down, trying to keep my shovel as vertical as possible. I aim to cut under the root ball cleanly. If the shrub is quite large, I might dig a full circle and then carefully try to undercut it, creating a sort of natural ball of soil and roots. It’s important to keep as much of the root system intact as possible. I’ve found that if the roots are circling the pot or the planting hole, it’s helpful to gently loosen them before placing the shrub in its new spot. This encourages outward growth. You can find more information on general planting advice.
4. Lift and Move the Shrub
Once I’m confident the root ball is free, I carefully lift the shrub. For smaller plants, I can usually manage this myself. For larger ones, I’ll enlist some help or use a tarp to drag it. It’s best to lift by the root ball, not the stem, to avoid damaging the plant. I try to keep the root ball moist and covered during the move, especially if it’s warm out. Once it’s in the new hole, I backfill with the amended soil, making sure there are no large air pockets. Then, a good watering is in order.
Transplanting Techniques
Now that you’ve got your Rose of Sharon dug up and your new spot prepped, it’s time for the actual move. This is where you want to be gentle. The goal is to get the shrub into its new home with as little fuss as possible, so it can start settling in right away.
Placing the Shrub in the Hole
When you put the Rose of Sharon into the hole you dug, make sure it’s at the same depth it was before. You can check this by looking at the soil line on the trunk. If it was planted too deep or too shallow in its old spot, now’s the time to adjust slightly. The root flare, where the trunk starts to widen out at the base, should be visible. You don’t want to bury that part.
Backfilling and Initial Watering
Start filling the hole around the root ball with the soil you took out. It’s a good idea to break up any big clumps. As you fill, gently firm the soil down with your hands or feet to get rid of big air pockets. Don’t pack it too hard, though; the roots still need to breathe and spread. Once the hole is mostly filled, give the plant a good, slow watering. This helps settle the soil and gets water down to the roots. You might need to add a bit more soil if it sinks too much after watering.
Securing the Root Ball
- Water thoroughly after planting to settle the soil and remove air pockets.
- Add more soil if the level drops significantly after watering.
- Avoid packing the soil too tightly; allow for air circulation.
Mulching for Protection
After watering, spread a layer of mulch, like wood chips or shredded bark, around the base of the shrub. Keep the mulch a few inches away from the trunk itself to prevent rot. Mulch helps keep the soil moist, keeps weeds down, and moderates soil temperature, which is really helpful for a newly transplanted plant. It’s like giving your Rose of Sharon a cozy blanket.
Remember, the less disturbance to the root system, the better. Try to keep the root ball intact as much as possible during the entire process. This is key to a smooth transition for your shrub.
Watering and Mulching
After you’ve moved your Rose of Sharon, giving it the right drink and a cozy blanket of mulch is pretty important. Think of it as tucking it in for a good start in its new home.
Watering After Transplanting
The most critical thing right now is keeping the soil consistently moist, but not waterlogged. I usually start by giving it a really good soak right after planting. This helps settle the soil around the roots and gets rid of any air pockets. For the first few weeks, I checked the soil moisture daily. If the top inch or two feels dry, it’s time for another watering. The goal is to encourage those new roots to grow out into the surrounding soil, and they can’t do that if things dry out too much.
- Water deeply immediately after planting.
- Check soil moisture daily for the first few weeks.
- Water whenever the top 1-2 inches of soil feels dry.
- Reduce watering frequency gradually as the plant establishes.
Applying Mulch
Once it’s watered in, I like to add a layer of mulch. This is like a protective blanket for the soil. I spread about a two-inch layer of organic mulch, like shredded bark or compost, around the base of the plant. It’s important not to pile it right up against the trunk, though. I leave a little space there to prevent rot. Mulch does a few good things: it helps keep the soil moist by reducing evaporation, it keeps the soil temperature more even, and it helps keep weeds from popping up and competing for water and nutrients. It’s a simple step that helps the plant settle in. You can find good mulching options at most garden centers, and it helps with moisture retention.
Proper watering and mulching are your best bets for helping the Rose of Sharon recover from the stress of being moved. Don’t overdo the watering, but don’t let it dry out completely either. That middle ground is key.
Fertilization
After you’ve successfully moved your Rose of Sharon, you might be wondering about feeding it. It’s a common question, and the answer is pretty straightforward. Generally, I hold off on fertilizing right away. The plant is already dealing with the stress of being transplanted, and adding fertilizer too soon can sometimes do more harm than good. It’s like trying to give a sick person a big meal right after they’ve had surgery – not the best idea.
Wait for Signs of New Growth
My general rule of thumb is to wait until I see clear signs of new growth. This usually means new leaves are unfurling or the plant is starting to bud. This indicates that the roots have settled in and the plant is ready to start actively growing again. Once I see that, I know it’s time to think about a little boost.
Choosing the Right Fertilizer
When I do decide to fertilize, I opt for a balanced, slow-release granular fertilizer. Something with an N-P-K ratio like 10-10-10 or 14-14-14 works well. These provide a steady supply of nutrients over time, which is perfect for a plant that’s still establishing itself. I avoid liquid fertilizers or anything too high in nitrogen right after transplanting, as these can encourage a lot of leafy growth at the expense of root development, which is what we really want to encourage at this stage. For lush growth, fertilize Althea plants in late winter or early spring with a balanced, slow-release granular fertilizer suitable for shrubs and trees.
Application Method
Applying the fertilizer is simple. I usually just sprinkle the recommended amount around the base of the shrub, keeping it a few inches away from the main stem. Then, I gently scratch it into the top layer of soil and water it in well. This helps the nutrients start to break down and become available to the roots. It’s important to follow the package directions for the specific product you’re using, as application rates can vary.
Frequency of Feeding
For the first year after transplanting, I typically only fertilize once, in the spring, after new growth has started. Once the Rose of Sharon is well-established, usually by the second year, I might fertilize again in late spring or early summer if it seems to need it, but I’m always observing the plant’s overall health and vigor. Over-fertilizing can be just as detrimental as under-fertilizing, so it’s best to err on the side of caution.
Remember, the goal is to support the plant’s recovery and encourage healthy root development. Patience is key, and letting the plant tell you when it’s ready for a feeding is often the best approach.
Monitoring for Stress
After you’ve moved your Rose of Sharon, it’s natural to worry a bit. I always keep an eye on my newly transplanted shrubs to see how they’re settling in. The biggest thing I look for is transplant shock, which is the plant’s reaction to the stress of being moved.
Signs of Transplant Shock
It’s pretty easy to spot if your Rose of Sharon is struggling. You might see wilting leaves, even if you’re watering regularly. The leaves could also turn yellow or brown prematurely, or you might notice leaf drop that seems a bit too fast. Sometimes, the plant just looks generally droopy and unhappy, not putting out any new growth.
- Wilting leaves
- Yellowing or browning leaves
- Premature leaf drop
- Lack of new growth
What to Do About It
If I notice these signs, my first thought is always about watering. It’s a balancing act – you don’t want to drown the plant, but you also need to keep that root ball consistently moist, not soggy. I usually check the soil moisture by sticking my finger a couple of inches down. If it feels dry, I give it a good watering.
I also make sure the new spot isn’t getting blasted by harsh afternoon sun, especially if the plant is still looking weak. Sometimes, just providing a bit of shade during the hottest part of the day can make a big difference. I might use a shade cloth or even just prop up a piece of cardboard temporarily.
I also avoid fertilizing right away. The plant needs to focus its energy on establishing roots, not on producing new leaves or flowers. I usually wait until I see clear signs of new, healthy growth before I even think about feeding it. For established shrubs, I know that proper pruning before transplanting can help reduce stress, and I try to remember that for next time. If you’re looking for more general advice on caring for these shrubs, you might find some helpful tips on Rose of Sharon care.
Long-Term Monitoring
Once the initial shock seems to be fading and I see some new growth, I still keep an eye on it for a few weeks. I’m looking for consistent watering, and I’ll continue to mulch around the base to help keep the soil temperature even and retain moisture. It’s all about giving the plant the best chance to recover and thrive in its new home.
Long-Term Care
After you’ve successfully moved your Rose of Sharon, the work isn’t quite done. Giving it the right care in the following months and years is key to seeing it thrive and bloom beautifully. I’ve found that consistent attention makes a big difference.
Watering Schedule
Watering is probably the most important thing to get right. When I first transplant a shrub, I water it deeply. Then, for the first few weeks, I check the soil moisture every couple of days. If the top inch or two feels dry, it’s time for another good watering. Once it’s established, I adjust based on the weather. During dry spells, I’ll water it maybe once a week, but in cooler, wetter periods, it might not need any extra water at all. It’s all about feeling the soil and responding to what the plant needs.
Mulching for Moisture and Weed Control
I always put down a layer of mulch after transplanting. It helps keep the soil moist, which is a big help, especially during those first few weeks. Plus, it cuts down on weeds, which compete with the Rose of Sharon for water and nutrients. I usually use shredded bark or compost. I make sure to keep the mulch a few inches away from the main stem to prevent rot. A good layer of mulch is something I’ve learned to rely on for healthy plant growth.
Pruning for Shape and Health
While you prune before transplanting to reduce stress, ongoing pruning is also important. I usually do a light pruning in late winter or early spring before new growth starts. This is when I remove any dead, damaged, or crossing branches. It helps maintain the shrub’s shape and encourages better air circulation, which can prevent diseases. Sometimes, I’ll do a bit of shaping in the summer after the main bloom flush if needed, but I try not to overdo it.
Fertilizing Considerations
Rose of Sharon plants aren’t usually heavy feeders, but a little boost can help them establish and bloom well. I typically wait until the second growing season after transplanting to start a regular fertilizing routine. When I do fertilize, I use a balanced, slow-release fertilizer in the spring. I just follow the package directions, usually scratching it into the soil around the drip line and then watering it in. Too much fertilizer can be harmful, so I’m careful not to overdo it.
It’s easy to get caught up in the excitement of a new planting, but remembering the long-term care is what truly makes a garden successful. Patience and observation are your best tools.
Keeping your trees healthy for the long haul is super important. Just like us, trees need good care to stay strong and look their best. We help make sure your trees get the attention they need to thrive year after year. Want to give your trees the best chance to grow? Visit our website today to learn more about our tree care plans!
Frequently Asked Questions
When is the ideal time to transplant my Rose of Sharon?
I find that the best times to move a Rose of Sharon are in the early spring, just as the plant is about to wake up, or in the fall, after it has finished blooming and is getting ready for winter. Moving it during these cooler, less active times helps the plant adjust with less stress.
Should I avoid transplanting during summer or winter?
It’s generally not a good idea to move Rose of Sharon during the hot summer months or when the ground is frozen in winter. These conditions can shock the plant and make it difficult for it to recover.
How should I prepare the new location for the Rose of Sharon?
Yes, I always prepare the new spot before I move the plant. This means digging a hole that’s about twice as wide as the root ball and just as deep. I also like to mix in some compost to give the soil a nutrient boost.
Do I need to prune the Rose of Sharon before moving it?
Before I dig up the shrub, I usually trim back its branches. This helps reduce the amount of water the plant needs to take up through its roots, which makes the whole transplanting process easier on the plant.
What’s the best way to dig up and replant the Rose of Sharon?
When I dig up the plant, I try to get as much of the root system as possible, keeping it all together in a large root ball. I then carefully place it in the new hole, making sure it’s at the same depth it was before. After filling the hole with soil, I water it thoroughly.
What kind of care does the plant need right after transplanting?
After transplanting, I make sure to water the Rose of Sharon deeply. I also add a layer of mulch, like bark chips, around the base. This helps keep the soil moist, keeps weeds down, and protects the roots from extreme temperatures.
When should I start fertilizing the transplanted Rose of Sharon?
I usually wait until I see new growth starting in the spring before I fertilize. A balanced, slow-release fertilizer or some compost worked into the soil is usually enough to help it get established.
How can I tell if my Rose of Sharon is experiencing transplant shock, and what should I do?
I keep an eye out for signs of transplant shock, like wilting leaves or buds dropping. If I see these, I make sure the plant is getting enough water, but not too much, and protect it from harsh sun or wind until it looks healthier.