How to Grow and Care for Black Locust Tree Seedlings
- August 25, 2025
- By Michael Woods
I’ve been looking into growing black locust tree seedlings myself, and it’s surprisingly straightforward. These trees are known for being tough and adaptable, which is great for anyone starting out. My goal is to share what I’ve learned about getting these little guys from seed to a healthy start, covering everything from preparing the seeds to making sure they have the best conditions to grow.
Key Takeaways
- Black locust tree seedlings need scarification to germinate, which can be done with sandpaper or hot water. I’ve found sandpaper works well.
- Plant scarified and soaked seeds about 1/4 inch deep in moist soil; germination can happen in just a few days.
- These seedlings thrive in full sun and prefer well-drained soil, though they are quite adaptable to different soil types.
- Water young seedlings regularly, but allow the soil to dry slightly between waterings once established.
- Protect young black locust tree seedlings from pests and consider pruning to encourage good structure as they grow.
Black Locust Seedlings
When I first started thinking about growing black locust seedlings, I wasn’t sure what to expect. This tree, Robinia pseudoacacia, is pretty interesting. It’s native to the Appalachian region, but people have planted it all over the place because it’s tough and the wood is really rot-resistant.
Black locust seedlings are known for their fast growth and ability to thrive in tough conditions. They can shoot up a few feet each year when they’re young, especially if they get plenty of sun and have soil that drains well.
Here are some key traits I’ve learned about:
- Growth Rate: Expect around 2 to 4 feet of growth annually when conditions are good.
- Hardiness: These trees do well in USDA zones 3 through 8.
- Thorns: Young trees often have thorns, which help protect them from hungry critters like deer and rabbits.
- Leaves: They have compound leaves, meaning each leaf stalk has several smaller leaflets. These turn yellow in the fall.
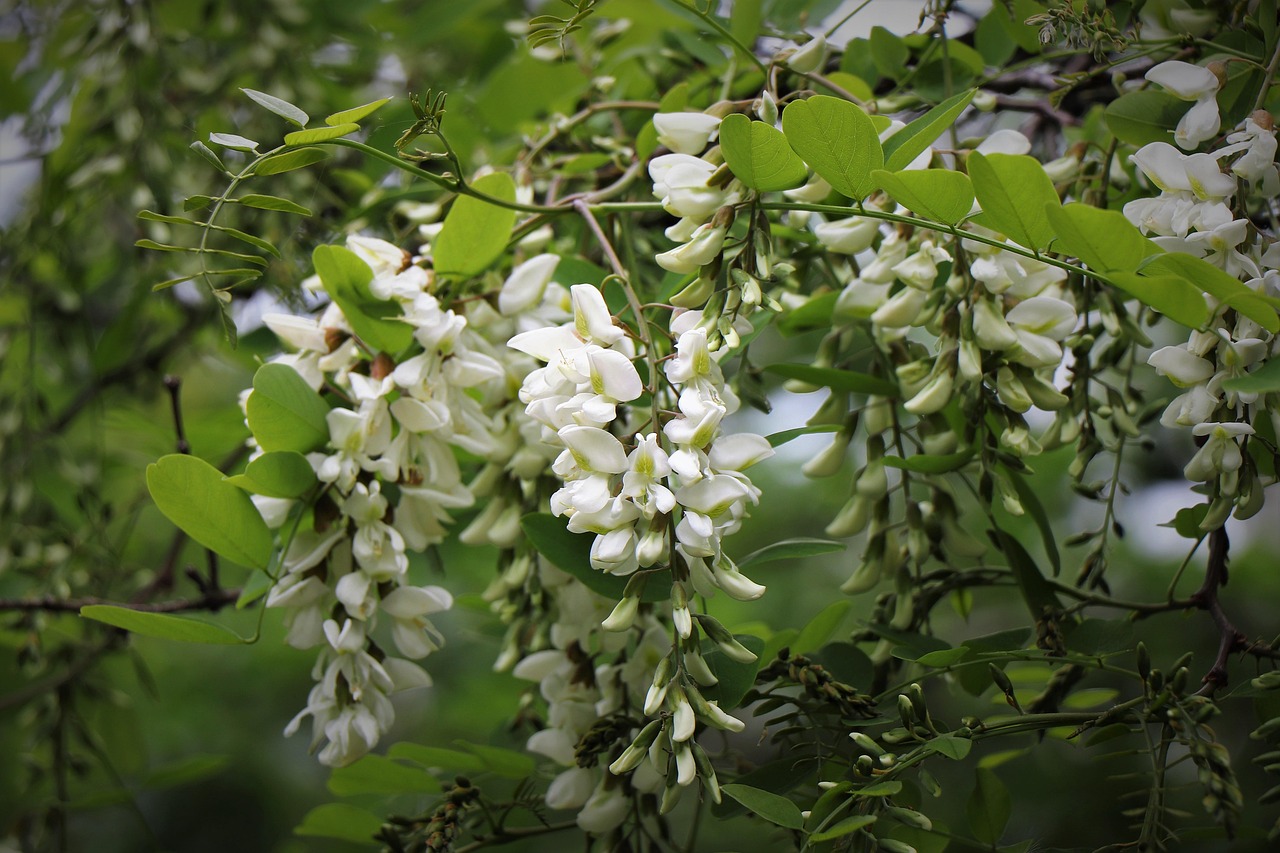
- Flowers: In late spring, they produce fragrant white flowers that hang in clusters, sort of like pea flowers.
It’s important to remember that black locust can spread easily, sometimes through its roots. This is something to keep in mind when deciding where to plant them.
Getting a black locust seedling started from seed isn’t too complicated, but it does require a little prep work to get those seeds to sprout. I’ll get into that next.
Selecting Quality Seeds
When I started thinking about growing black locust seedlings, the first thing I focused on was getting good seeds. It’s not like picking up a packet of tomato seeds at the garden center; you need to be a bit more discerning. Finding viable seeds is the absolute first step to success.
Where do you even get them? Sometimes, local nurseries might have them, or you can look for specialized online seed suppliers. I’ve found that checking with forestry departments or native plant societies in my area can also be a good lead. They often know where to source seeds from healthy, established trees.
When you’re looking at seeds, here’s what I try to keep in mind:
- Appearance: Look for seeds that are plump and free from obvious damage, mold, or insect holes. They should have a firm, hard outer shell.
- Origin: If possible, try to find out where the seeds came from. Seeds from trees grown in conditions similar to where you plan to plant them are usually a good bet.
- Freshness: While black locust seeds can remain viable for a long time, fresher seeds generally have better germination rates. If there’s a harvest date or a general indication of when they were collected, that’s helpful.
It’s important to remember that black locust seeds have a very tough outer coating. This coating prevents them from absorbing water, which is why we’ll need to do some special preparation later on. Without this preparation, germination can be very slow or might not happen at all.
I’ve learned that not all seeds are created equal, and taking a little extra time to select good ones really pays off down the line. It’s worth the effort to find seeds from a reputable source, like those found at native plant suppliers.
Scarification Techniques for Better Germination
Black Locust seeds have a tough outer shell, which is why they can be tricky to get to sprout. This hard coating acts like a protective barrier, but it also stops water from getting in, which is what the seed needs to start growing. To help them along, I usually give them a little nudge to break through that shell. This process is called scarification.
There are a few ways I go about this. One common method is to physically nick the seed coat. I use a small file or even a sharp knife, being careful not to damage the inside of the seed. Just a tiny scratch on the side is enough. Another approach involves using heat. A quick dip in hot water, not boiling, can sometimes soften the seed coat enough. I’ve also heard of people using sandpaper to rough up the surface. The goal is always to allow moisture to penetrate the seed.
For a more hands-on approach, you can try a simple mechanical scarification. Here’s how I do it:
- Gather your seeds: Make sure they are dry and clean.
- Prepare your tools: You’ll need a small file, a sharp craft knife, or even coarse sandpaper.
- Scarify: Gently rub the seed against the file or sandpaper, or make a small nick with the knife. Focus on the side opposite the little bump (the hilum).
- Inspect: Look for a slight change in color or a tiny opening in the seed coat.
It’s important to remember that not every seed will need scarification, and overdoing it can harm the seed. It’s a bit of trial and error to find what works best for your specific batch of seeds. I usually scarify a portion and leave some untreated to compare results.
Another method I’ve experimented with is using hot water. This is a bit gentler than physical scarification and can be done in batches. I pour hot, but not boiling, water over the seeds and let them soak for about 12 to 24 hours. You can find more details on tree seed germination techniques if you want to explore this further. After soaking, I check to see if any seeds have swollen or softened; those are the ones ready to go.
Efficient Germination
After you’ve prepared your Black Locust seeds through scarification, the next step is to get them germinating. This process is pretty straightforward, but doing it right makes a big difference. I usually start by getting my planting medium ready. A good quality potting mix that drains well is key. I fill a shallow tray or pot with this mix, making sure it’s moist but not waterlogged. Think of it like a wrung-out sponge.
Then, I take the scarified and soaked seeds. The soaking period, typically 24 hours, helps the seed coat absorb water, which is what triggers germination. After soaking, I gently pat the seeds dry.
When planting, I aim for a depth of about 1/4 inch. Black Locust seeds are small, so you don’t want to bury them too deep. I place them on the surface of the moist soil and then cover them lightly. Spacing them a little apart helps prevent overcrowding later on.
The goal here is to create a consistent, warm, and humid environment for the seeds. I often cover the tray with a clear plastic lid or plastic wrap to keep the moisture in. It’s important to check on them daily. If the soil surface starts to look dry, I mist it lightly with water.
Germination can happen quite quickly, sometimes within a few days, especially if the scarification and soaking were done properly. Once you see the first little sprouts pushing through the soil, you’ll know you’re on the right track. At this point, I usually remove the plastic cover to allow for better air circulation and to prevent damping-off disease, which can affect young seedlings.
Ideal Light Conditions for Seedlings
When I first started growing black locust seedlings, I wasn’t entirely sure about the light situation. It turns out, these little guys are sun-lovers. They really need a good amount of bright light to get going strong.
For indoor seedlings, the best spot is usually right by a south-facing window. I try to keep mine no more than a foot away from the glass. This gives them the most direct sunlight possible, which is what they crave. If you don’t have a south-facing window, an east or west-facing one can work, but you might need to supplement with a grow light, especially during shorter days. They really don’t do well in low-light conditions; you’ll notice them getting leggy and weak if they don’t get enough sun.
Here’s a quick rundown of what I’ve found works best:
- Bright, direct sunlight: Aim for at least 6-8 hours of direct sun daily if you can provide it. This is ideal for outdoor starts or very sunny indoor spots.
- Indirect bright light: If direct sun is too intense (especially in the hottest part of summer for outdoor seedlings), bright, indirect light is the next best thing. Think of a spot that gets morning sun but is shaded during the hottest afternoon hours.
- Avoid deep shade: Black locust seedlings will struggle and likely won’t thrive if they are kept in a shady corner or a room with minimal natural light.
I learned that consistent light is key. If you’re growing indoors, rotating the pot every few days helps ensure all sides of the seedling get some light, promoting even growth. It’s a small step, but it makes a difference in how sturdy they become.
If you’re starting seeds outdoors, find a spot that gets plenty of sun. If you’re transplanting them into pots to grow on before planting in the ground, treat those pots the same way – give them the sunniest location you have available.
Soil & Moisture Requirements for Seedling Success
When I first started thinking about growing black locust seedlings, I wasn’t sure what kind of soil they’d prefer. It turns out, these trees are pretty adaptable, which is good news for me. They don’t need anything too fancy, really. A well-draining soil mix is the most important thing to get right. If the soil stays too wet, the roots can rot, and that’s a quick way to lose a seedling. I’ve found that a sandy loam works well, or even just a standard potting mix with some added perlite or coarse sand to help with drainage.
When it comes to moisture, it’s a bit of a balancing act. You want the soil to be consistently moist, but not waterlogged. For young seedlings, I usually check the soil every couple of days. If the top inch feels dry, it’s time for a drink. I try to water them thoroughly, letting the water run through the pot, and then letting it drain completely. Overwatering is definitely something to watch out for, as these trees don’t like sitting in soggy conditions.
Here’s a quick rundown of what I aim for:
- Soil Type: Sandy loam or a good quality potting mix amended for drainage.
- pH Level: Black locust trees are quite tolerant of different soil pH levels, but they generally do best in slightly acidic to neutral soil (pH 6.0-7.0).
- Watering Frequency: Check the top inch of soil; water when dry, but avoid waterlogging.
It’s better to underwater slightly than to overwater, especially when the seedlings are very young. You can always add more water, but it’s much harder to fix waterlogged roots.
Transplanting Seedlings to the Ground
Once your black locust seedlings have developed a few sets of true leaves and are looking sturdy, it’s time to think about moving them to their permanent spot. I usually wait until the last frost has passed, typically in late spring. This gives them a good head start without the risk of a sudden cold snap.
Before you dig them up, give the seedlings a good watering. This helps the soil cling to the roots, making the move less stressful for the plant. When you’re ready to transplant, dig a hole that’s a bit wider than the seedling’s root ball. Gently ease the seedling out of its current container, trying not to disturb the roots too much. Place it in the new hole so the top of the root ball is level with the surrounding soil. Backfill the hole with soil, firming it gently around the base of the seedling.
It’s important to water them thoroughly right after transplanting to help settle the soil and reduce transplant shock.
Here are a few things I always keep in mind:
- Timing is key: Aim for a cloudy day or late afternoon to transplant. This reduces the stress from direct sunlight on health: Avoid damaging the roots as much as possible. If the roots are tightly bound, a gentle loosening can help them spread out in the new soil.
- Initial care: Keep the newly transplanted seedlings well-watered for the first few weeks. They’re still getting established and need consistent moisture.
Moving young plants can feel a bit nerve-wracking, but with a little care, your black locust seedlings should take to their new home quite well. Just remember to be gentle and provide that initial support with water.
If you’re moving them to a location where deer are common, I’d suggest putting up some temporary protection, like a small cage or fencing, around the young trees. They can be quite tasty to deer when they’re young. For more information on transplanting, you might find details on honey locust seedlings helpful, as the process is quite similar.
Mulching, Weed Control & Deer Protection
Once your black locust seedlings are established, keeping the area around them clear of weeds is important. Weeds compete for water and nutrients, which can really slow down your seedling’s growth. I usually tackle this by hand-pulling weeds when the soil is a bit damp, making it easier to get the whole root.
Applying a layer of mulch around the base of the seedlings is a good idea. It helps hold moisture in the soil and also suppresses weed growth. Just be sure to keep the mulch a little away from the stem itself to prevent rot. A good organic mulch, like wood chips or shredded bark, works well.
Deer can sometimes be a problem for young trees, nibbling on the leaves and tender stems. If deer are common in your area, you might need to consider some form of protection. Simple fencing or individual tree guards can make a big difference.
Protecting your young black locusts from competition and browsing is key to helping them get a strong start. It’s a bit of extra work, but it pays off in the long run.
Here are a few things to keep in mind:
- Weed Control: Regularly check for and remove weeds, especially during dry spells when they can outcompete your seedlings for water. Hand-pulling is often the most effective method for small seedlings.
- Mulching: Apply a 2-3 inch layer of organic mulch around the base of each seedling, leaving a small gap around the trunk. This conserves moisture and smothers weeds.
- Deer Protection: If deer pressure is high, consider using tree guards or temporary fencing around your seedlings. This physical barrier will prevent them from being browsed.
Remember, a healthy start means a stronger tree later on. I’ve found that paying attention to these details early on really helps the seedlings thrive. It’s also worth noting that black locust is known for its ability to fix nitrogen, which can actually help improve the soil around it over time, a nice benefit for any garden or planting project. You can find more information on planting trees like this at the Prunus mume tree.
Monitoring Pests & Common Diseases
When growing black locust seedlings, I’ve found that keeping an eye out for common pests and diseases is pretty important. It’s not like they’re completely immune to problems, you know? One of the main culprits I watch for is the locust borer, Megacyllene robiniae. These beetles can really do a number on young trees, especially the trunk. Their larvae tunnel into the wood, which weakens the tree and can even lead to its death if it’s a bad infestation. Another one to be aware of is the locust twig borer. These little guys bore into the twigs, causing them to die back. It’s mostly an aesthetic issue for seedlings, but it’s still something to manage.
I also keep an eye out for signs of fungal issues, though these are less common on very young seedlings. Sometimes, you might see leaf spots or wilting, which could point to a fungal problem. It’s usually a good idea to remove any affected leaves or branches promptly to stop it from spreading.
Here’s a quick rundown of what I look for:
- Locust Borer (Megacyllene robiniae): Look for small holes in the trunk, sawdust-like frass, and weakened or dying branches. The adult beetles are quite striking, with yellow and black bands.
- Locust Twig Borer: You’ll see dead, blackened tips on the twigs. The larvae are small and bore into the new growth.
- Fungal Diseases: Watch for leaf spots, powdery mildew, or general wilting that doesn’t seem related to watering.
If I notice any signs of infestation or disease, my first step is usually to try and remove the affected parts. For borers, this might mean pruning out infested twigs or, in more severe cases, considering if the seedling is salvageable. Good air circulation and avoiding overwatering can also help prevent fungal issues.
Keeping the seedlings healthy overall is the best defense against most pests and diseases. This means providing them with the right conditions – good sunlight, proper watering, and decent soil – so they can grow strong and better resist any unwelcome visitors.
Pruning Seedlings for Straight, Structural Growth
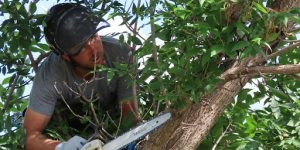
When you’re working with black locust seedlings, getting them to grow straight and strong from the start is pretty important. It sets them up for a healthier life later on. I usually wait until late winter, when the tree is dormant, to do any major shaping. This is when the sap flow is minimal, so you won’t see that excessive bleeding that can happen if you prune at the wrong time. Spring is definitely a time to avoid pruning.
My approach is to focus on removing any branches that are crossing each other or growing too close together. These can create weak spots as the tree matures. I use sharp bypass pruners for clean cuts. It’s also a good idea to watch out for those thorns at the base of the leaf stalks – they can be a bit prickly!
Here’s a quick rundown of what I look for:
- Crossing Branches: Branches rubbing against each other can cause damage and invite disease. I remove the one that seems weaker or growing in a less desirable direction.
- Congested Growth: If several branches are growing from the same spot, I thin them out to allow for better air circulation and light penetration.
- Low Branches: While you might be tempted to clear the lower trunk, I generally avoid removing lower limbs unless they are clearly problematic. Removing too much lower growth can stress the seedling.
The goal with young black locusts isn’t to create a fancy shape, but to encourage a single, strong central leader and well-spaced side branches. Think of it as guiding the tree’s natural growth habit rather than forcing it into something it’s not.
If you notice any dead, damaged, or diseased branches at any time of year, it’s best to remove them right away. Just make a clean cut back to healthy wood. This helps prevent any issues from spreading. For shaping, I’m mostly just trying to keep the main stem growing upwards without too much competition from side branches. If a side branch is growing almost as strong as the main stem, I might prune it back a bit to encourage the main stem to take the lead. It’s a simple process, really, just about giving the seedling the best start for a sturdy structure. You can find more information on tree care, like understanding different species such as the paper birch, at various horticultural resources.
Watering & Caring During Drought Conditions
When the weather gets really dry, I find myself checking on my black locust seedlings more often. These young trees, while tough once established, can be a bit sensitive when they’re just starting out. The key is to provide consistent moisture without waterlogging the soil. If the top inch of soil feels dry to the touch, it’s time to water. I usually give them a good, deep soak rather than a light sprinkle, aiming to moisten the entire root ball. This encourages deeper root growth, which is exactly what we want for future resilience.
It’s easy to overthink watering, especially when it’s hot. Too much water can be just as bad as too little, leading to root rot, which these seedlings really don’t like. Signs of this include yellowing leaves that might also droop or curl. On the flip side, if they’re really thirsty, you might see wilting or even some leaf drop. It’s a balancing act, for sure.
Here’s a quick rundown of what I do:
- Check the soil moisture regularly: Stick your finger about an inch down. If it’s dry, water.
- Water deeply: Aim to saturate the root zone, letting excess water drain away.
- Adjust based on conditions: More frequent watering might be needed during heatwaves, less during cooler spells.
I’ve learned that observing the seedlings themselves is the best guide. Their leaves will tell you a lot if you pay attention. A slight droop might mean they need a drink, but if the soil is already damp, I look for other causes.
If a prolonged dry spell hits, I might increase the frequency of watering, but I’m always careful not to overdo it. It’s better to water thoroughly less often than to give them little sips every day.
Long-Term Maintenance
Black Locust trees are known for their vigorous growth and their tendency to spread, which can be a concern if you’re trying to keep them contained. The primary way they spread is through their root system, sending up new shoots, or ‘suckers,’ from the parent tree. They can also spread by seed, though root suckering is usually the bigger issue for containment.
If you’re dealing with seedlings popping up in your yard, regular mowing is often enough to keep them in check, especially when the grass is growing well. However, during dry spells, the locust seedlings might grow while the grass struggles, making them more noticeable.
For more established or persistent sprouts, I’ve found that tackling the roots directly can make a big difference. The best time to do this is in the fall. You can dig around a sprout, expose its root, and then pull. It’s easier if the ground is moist. Follow the root as far as you can, and cut it off with a saw or spade. You’ll end up digging a bit of a trench, but you can remove a good amount of the root material this way. This method has helped me significantly slow down the spread in my own yard.
When it comes to larger, established trees that you need to remove or control, there are a couple of approaches. One common method involves cutting the tree down and immediately applying a herbicide, like a glyphosate or triclopyr formulation, to the freshly cut stump. This helps prevent the roots from sending up new shoots. Another method for thinner-barked trees is basal bark application, where a specific herbicide mixed with oil is sprayed on the lower 15 inches of the trunk. Always remember to wear protective gear and follow the product’s instructions carefully if you choose to use herbicides.
Black Locust’s aggressive nature means that controlling its spread often requires consistent effort, focusing on either mechanical removal of roots or targeted herbicide application to prevent regrowth.
Best Practices for Thriving Black Locust Seedlings
To really get your black locust seedlings off to a good start and keep them healthy as they grow, I’ve found a few practices make a big difference. It’s not overly complicated, but paying attention to the details helps a lot.
First off, remember that these trees are tough. They don’t need a lot of fussing over, especially when it comes to soil. They can handle pretty much anything, from sandy stuff to clay, as long as it’s not constantly waterlogged. I’ve seen them do well in places that dry out between rains, which is pretty handy.
When it comes to light, full sun is the sweet spot for black locusts. They can handle a bit of shade, but you’ll get the best growth and the most vigorous plants if they’re in a sunny location. This is especially true for young seedlings.
Watering is important, particularly when they’re just starting. Keep the soil consistently moist, but not soggy, until they get established. Once they’re a bit bigger, they become quite drought-tolerant. I usually check the soil moisture by sticking my finger in about an inch or two; if it feels dry, it’s time for a drink. For established trees, watering once or twice a month during dry spells is usually enough.
Here’s a quick rundown of what I focus on:
- Consistent moisture for young plants: Don’t let them dry out completely.
- Full sun exposure: Aim for at least six hours of direct sunlight daily.
- Well-drained soil: Avoid areas where water pools.
- Minimal fertilization: Black locusts are nitrogen-fixers and usually don’t need extra food.
- Watch for pests: Borers and leaf miners can be an issue, though the trees often recover.
Pruning is also something to consider. While they don’t need heavy pruning, I like to trim off any crossing branches or ones that look weak, usually in late winter or summer. Just be mindful of those thorns at the base of the leaf stalks when you’re working.
One thing I’ve learned is that these trees can spread. If you’re planting them in an area where you don’t want them to take over, like a garden bed, you’ll need to manage their suckering. Digging up and transplanting suckers is one way to propagate them, but it also means you need to keep an eye on where they’re popping up.
Finally, remember that transplanting is a key step. When it’s time to move your seedlings to their permanent spot, doing it in early spring before growth starts or in the fall after they’ve gone dormant is best. Prepare the new site well, and water it thoroughly after the move. This is similar to how you’d transplant other woody plants, like a Rose of Sharon, to minimize stress. Proper transplanting techniques can really set them up for success.
Want your Black Locust seedlings to grow strong and healthy? We’ve got the tips you need! Learn the best ways to care for your young trees so they can really take off. For more expert advice and to get started with professional tree care, visit our website today!
Frequently Asked Questions
What is the best way to get black locust seeds to sprout?
I have found that rubbing the seeds on sandpaper until a small white spot appears is a very effective way to help them sprout. After this, soaking them in water for 24 hours can speed things up even more. Another method involves pouring hot, but not boiling, water over the seeds and letting them soak for a full day. If they don’t look bigger after 24 hours, I might try the hot water soak again.
How should I plant the seeds after preparing them?
When I start black locust seedlings, I like to put them in a pot with soil that is already damp. I plant the seeds about a quarter of an inch deep. If I’ve prepared the seeds correctly, they usually start to grow within just a few days. I keep them in the pot until they have a few sets of leaves before moving them.
What kind of sunlight do black locust seedlings need?
Black locust trees really love sunshine! I make sure my seedlings get at least six hours of direct sunlight every day. They don’t do well in shady spots, as other, taller trees can easily outgrow and block the light they need to survive.
What kind of soil is best for black locust seedlings?
I’ve noticed that black locust trees aren’t too picky about soil, as long as it drains well. They can grow in sandy or even packed soil. However, they don’t like soil that stays wet all the time. For seedlings, I aim for soil that is moist but also allows excess water to drain away.
How often should I water my black locust seedlings?
Young black locust trees need regular watering, especially during their first year, to help their roots grow strong. I water them enough to keep the soil moist. Once they are more established, they can handle dry spells pretty well and might only need water once or twice a month if there’s no rain.
When is the best time to transplant black locust seedlings into the ground?
I usually wait until spring to move my seedlings from their starting pot to their permanent spot in the ground. I dig a hole that’s twice as wide and twice as deep as the seedling’s root ball. After placing the seedling in the hole and filling it halfway with soil, I water it a bit before finishing filling the hole.
Do black locust seedlings need fertilizer?
Black locust trees don’t usually need fertilizer because they can pull nitrogen from the air, which helps them and other plants grow. They are quite tough and can handle poor soil conditions quite well on their own.
When and how should I prune black locust seedlings?
I’ve found that pruning is generally not a big requirement for black locust trees. However, if I want a straighter trunk or need to remove branches that are crossing, I’ll prune them in late winter when the tree is resting or in the summer. I avoid pruning in spring because the sap might leak out and attract bugs.